Showing posts with label holidays. Show all posts

Friday, December 31, 2010

Happy New Year's!!!!!!

I would love to personally be with every one I met in the blogosphere this year, and hug each and every one of them.

 
foto via

To each and everyone reading Casa Haus, and care for what I have to say,
here's another huge hug for you!

I wish this 2011 brings you joy and blessings, and luck to fullfill your greatest dreams. I'm especially hoping to be able to enjoy this new year, day by day, with the surprises it might bring within.
 
Happy New Year!!!!!


Thursday, December 23, 2010

Merry Christmas!


Merry Christmas y'all!


The time has come. Christmas Eve is here!
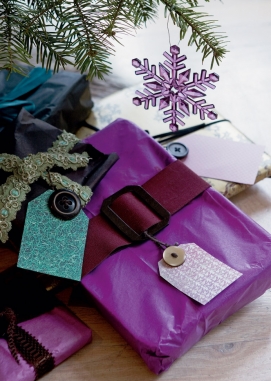
I wish you the happiest holidays! May you all be blessed with love, peace and joy this time of year, and always.


:D

------------------------------------------------
(Gorgeous Scandinavean design via bo bedre)


Monday, December 13, 2010

The Party is Here!

Welcome to our first linty party at Casa Haus.


Today it's all about sharing our Christmas home, crafts, diy's, you name it! If it's christmassy, it works!

In my case, I've been working lately on this project I'm sharing with you. I'm so excited. I hope you like it and find it inspiring for your own home.


As you recall, last year I made a pine cone wreath, and eventhough I loved it, this year I'm going for something new. Still pinecones, but with a twist. I got it finished just in time to participate in the party! Yay!


I used some magnolia leaves (from mom's garden), last year's pine cones, and some berries from the craft store.

Magnolia leaves are excellent for crafts. They are absolutely gorgeous. After drying them, I used acrylic paint to keep the silver theme going.


And I hot glued them to a wreath I bought at the craft store.


It's actually pretty simple, you just need to figure out the place for each leaf and pine cone. ;)


Ain't it lovely? There I am with my new wreath... and my bff, my camera. :P
and now, let's start the party!

Hop over to Casa Haus Spanish and link up!


Tuesday, November 23, 2010

Lovely Pine Cone Wreath

Christmas is just around de corner

 and I've got a trendy and easy diy wreath for your front door!

A year ago, I made this lovely pine cone wreath, and enjoyed it so much! So, while I'm in the First Communion up and downs, I thought I'd share with you a post I wrote last year with full instructions. How's that sound to you? 


{My inspiration for this project was Eddie Ross' ornament wreath (if you haven't checked it out, I strongly recommend you to; it's beautiful and easy). }

Supplies:

50 small sized pine cones.

Craft paint (your choice of color).

Wire rings (available at craft supply stores).

A hanger.

A paintbrush.

Hot glue gun.

Ribbons.


How to:

Paint your pine cones (you can go natural too if you wish).

I chose a silver tone for my decorations, so that's what I used to paint them.
I only painted the tips. (I spent a wonderful afternoon with my mom and daughter doing this ;)


{They're lovely just like this.}

Hot glue the wire rings to the top of the pine cone.


Bend the hanger into a circle.


Untwist the end of the hanger and string one pine cone at a time.


Twist the hanger again to close the circle.

Hot glue a ribbon to cover the hook end of the hanger.


Make a simple bow out of color coordinating ribbons.


Hot glue it to the wreath.


Enjoy!


I'm liking this so much, I'm thinking about making a few to give as presents to my family and friends. I seriously can't stop staring at it: my first Xmas wreath!

Best of all: easy on my pocket, easy on the environment. Cool!

Wednesday, October 13, 2010

Halloween Decorating- Easy Bats

We've started decorating for Halloween on the weekend. With a girl at home, Halloween is a huge holiday, and a great chance for us to have fun crafting and thinking of ideas for our home.

One of our favorite crafts is making bats. I got this idea from Country Living, so you probably know it already. In case you don't, it's a wonderful idea. Easy, unexpensive, quick, and huge impact. Seriously. Just take a look at our house!


You'll need:

Black construction paper (I chose one with a soft texture, almost velvet-like)
Scissors
Tape
Bat template from Country Living (get it here) 

How to:

  Start by printing the bat template from Country Living.
It's a good idea to resize with a photocopier. This way you'll have different bat sizes. I used 3 different sizes.

Cut out.

Following the instructions, trace the template onto your paper. Remember the template is only half the bat, so fold you paper to get the whole bat.

Cut.

This is how they look. Spooky!

I cut plenty of bats. Remember, the more, the merrier.
Using tape, place them everywhere. I put many in our balcony.

And our downstairs window.

The results are truly amazing! They look very real!
How do you like them?

And they're equally cool from the inside. This is how they look from our bedroom.
There you have it, one of our easiest Halloween crafts. By the way, kids love it, because they can help you out all along the way.

Meanwhile, we're still crafting our way out of Halloween. Our house is a complete mess, but it'll be over soon (I hope), and soon I'll be sharing with you our projects. We're excited, and loving it!  =)

What are you up to?
Are you into Halloween decorating?
Do tell!

Sunday, October 3, 2010

Excellent ideas - Decorate for Fall

Fall has finally fallen, and we're surrounded by warm tones in leaves, soothing sounds of wind, sweet aromas in the air, and soft textures in throws and clothing.

Same goes for our home. It's time to get it in the mood for this time of year, with beautiful colors and lovely accents. Plus, it's a foreword for the joyful Holiday season. Here are 5 tips to get your home ready for fall.
1. Start by your entrance


Prepare a welcoming door with a fall wreath.
You can try to make your own with fallen leaves, of pinecones. Best thing is you can use this same wreath for Christmas, by simply adding red and green touches.

2. Accesorize with warm tones


A great way to incorporate fall into your home is by using warm-tone accesories. Think gold, orange, and brown.
3. Leaves, leaves, and leaves!


The main characters in this season are leaves. You can decorate anything from walls, to pillow covers. I love the use of gold in these plates by West Elm, because it gives an extra touch of elegance. 


Using leaves doesn't have to be expensive or difficult. You can pick up leaves and go DIY (love it!). Place fallen leaves anywhere, they are the perfect decorating element this time of year.

4. Candles


Candles bring warmth to a room even without being lit. Choose scents that go with the season for an extra touch of fall.

5. Throws and pillows


We cannot forget throws and pillows. A throw in your living room or TV room is perfect for guests or family members snuggling on the sofa and late-night chit-chat.


If you choose pillows, go for knitwear to add texture.

As you see, fall decor shouldn't be elaborate or high-budget. You can buy your own home to bring fall. A few details here and there can really make a difference!


Tuesday, March 30, 2010

Spring and Easter

Just a little stop over at Martha's


Are you already on Springbreak where you live?

LinkWithin