Showing posts with label kids crafts. Show all posts

Wednesday, August 24, 2011

Stylish and Happy Doll House

I've always liked doll houses. In fact, I firmly believe my design addiction grew on me since I was a little girl, all because of doll houses. I had one, I still secretly keep the tiny furniture. Even now in my early thirties with a girl who's begining to leave toys behind, I still feel an irresistible attraction towards doll houses. I want them all. And making my own doll house is even more appealing to me, because it involves everything I like: houses, interior design, tiny things, DIYing, crafting, you name it!

So I guess you'll know by now my amazing surprise with the lovely house Megan from mouse house made for her girls.


Ain't it a beauty? She's fun, happy, and full of details! She's got it all, especially tiny towels, frames, art, a craft room, all made by the amazing  Megan.
It gets me thinking I should make a doll house too. Although I guess I should finish doing my real home before I make a doll one, right? =)
--------------------------------------------------------------
P.S. There are a few days left before the giveaway closes, so join us! You have the chance to win a beautiful enamel sign, courtesy of Ramsing. For more info on how to participate, click here!


Thursday, August 18, 2011

DIY- The Perfect Lamp for Kids


Looking for a simple yet amazing DIY for the weekend? I found it at matsutake, with her gorgeous stuffed animal lamp. It's perfect for any kid's room for your kids or as a present. Just take any animal made of fabric, coat it with a fabric stiffener, pull out all stuffing, and stuff the light string inside (be sure to use LED lights only if you don't want safety issues- and of course we don't, do we?)

Easy-peasy. And delightful.

Monday, May 9, 2011

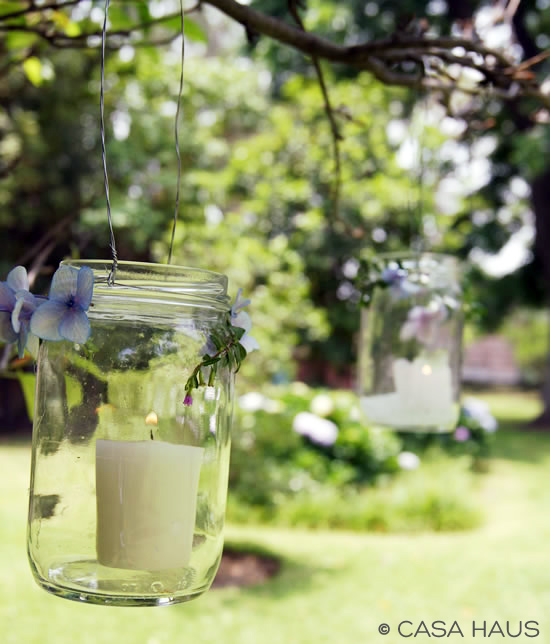
Sweet Jar Lanterns - Simple Tutorial

Longer days, warmer weather, everything is perfect for the lovely, summer outdoors. After working on a candle catalogue production these last couple of days, I came up with an easy DIY project to share in Casa Haus. Being such a lighting fan (especially candle lighting), I've been pretty busy coming up with this easy tutorial.
 I hope you enjoy it!


I love this DIY because it is really easy, and it's just as good for both home and party decor. Plus, it's eco-friendly. Win-win situation here!

So let's start, shall we?

Here's what you'll need:
  • Clean and empty jars.
  • Tea or votive candles.
  • Metal wire (mine was 24 gage)
  • Wire cutters
Cut 1 yard of wire and wrap it under the lip, forming a tight ring.


 Twist the wire together to close the ring.


Twist all your way up.

Bend the twisted wire over the top forming a handle.
Carefully introduce the wire's tip into the opposite side of the ring. This is a little tricky, since the ring must be tight, but be patient!

Bend the wire up and twist some more to finish.

This is an extra step, but it's totally worth it. Hotglue flowers or foliage (artificial works just as good).


That's it! Now just place the tea candle inside, and hang them around.  I love the way they look in my parents' garden.


Enjoy your week!

**update**

For those of you coming from Kate's Spring/Summer link party,
welcome!
I hope you enjoy it around Casa Haus!!!

Tuesday, November 23, 2010

Lovely Pine Cone Wreath

Christmas is just around de corner

 and I've got a trendy and easy diy wreath for your front door!

A year ago, I made this lovely pine cone wreath, and enjoyed it so much! So, while I'm in the First Communion up and downs, I thought I'd share with you a post I wrote last year with full instructions. How's that sound to you? 


{My inspiration for this project was Eddie Ross' ornament wreath (if you haven't checked it out, I strongly recommend you to; it's beautiful and easy). }

Supplies:

50 small sized pine cones.

Craft paint (your choice of color).

Wire rings (available at craft supply stores).

A hanger.

A paintbrush.

Hot glue gun.

Ribbons.


How to:

Paint your pine cones (you can go natural too if you wish).

I chose a silver tone for my decorations, so that's what I used to paint them.
I only painted the tips. (I spent a wonderful afternoon with my mom and daughter doing this ;)


{They're lovely just like this.}

Hot glue the wire rings to the top of the pine cone.


Bend the hanger into a circle.


Untwist the end of the hanger and string one pine cone at a time.


Twist the hanger again to close the circle.

Hot glue a ribbon to cover the hook end of the hanger.


Make a simple bow out of color coordinating ribbons.


Hot glue it to the wreath.


Enjoy!


I'm liking this so much, I'm thinking about making a few to give as presents to my family and friends. I seriously can't stop staring at it: my first Xmas wreath!

Best of all: easy on my pocket, easy on the environment. Cool!

Wednesday, October 13, 2010

Halloween Decorating- Easy Bats

We've started decorating for Halloween on the weekend. With a girl at home, Halloween is a huge holiday, and a great chance for us to have fun crafting and thinking of ideas for our home.

One of our favorite crafts is making bats. I got this idea from Country Living, so you probably know it already. In case you don't, it's a wonderful idea. Easy, unexpensive, quick, and huge impact. Seriously. Just take a look at our house!


You'll need:

Black construction paper (I chose one with a soft texture, almost velvet-like)
Scissors
Tape
Bat template from Country Living (get it here) 

How to:

  Start by printing the bat template from Country Living.
It's a good idea to resize with a photocopier. This way you'll have different bat sizes. I used 3 different sizes.

Cut out.

Following the instructions, trace the template onto your paper. Remember the template is only half the bat, so fold you paper to get the whole bat.

Cut.

This is how they look. Spooky!

I cut plenty of bats. Remember, the more, the merrier.
Using tape, place them everywhere. I put many in our balcony.

And our downstairs window.

The results are truly amazing! They look very real!
How do you like them?

And they're equally cool from the inside. This is how they look from our bedroom.
There you have it, one of our easiest Halloween crafts. By the way, kids love it, because they can help you out all along the way.

Meanwhile, we're still crafting our way out of Halloween. Our house is a complete mess, but it'll be over soon (I hope), and soon I'll be sharing with you our projects. We're excited, and loving it!  =)

What are you up to?
Are you into Halloween decorating?
Do tell!

LinkWithin